How to fix Windows 10 stuck on boot screen in VirtualBox
This step-by-step tutorial will show you what to do when Windows 10 is stuck on the boot screen in VirtualBox.
The boot screen is the loading screen with the Windows logo you'll see when you start Windows 10.

Solution 1: Change 'Paravirtualization Interface' settings
- Make sure the virtual machine is turned off.
- Right-click on the Windows 10 virtual machine.
-
Click on Settings.
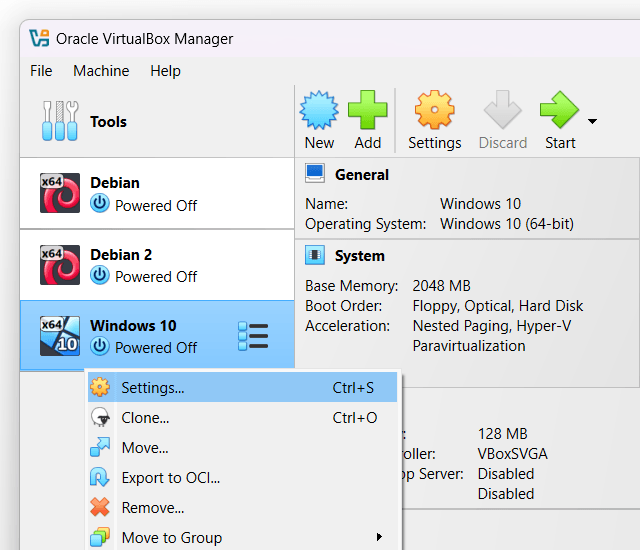
-
In the settings window, you click on System located in the left menu.
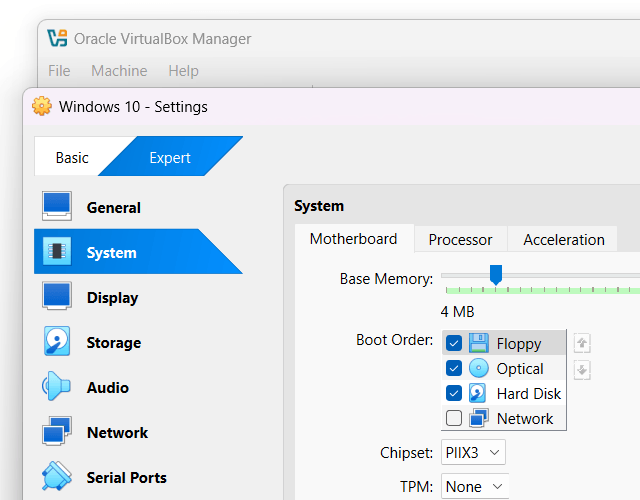
-
Click on Acceleration.
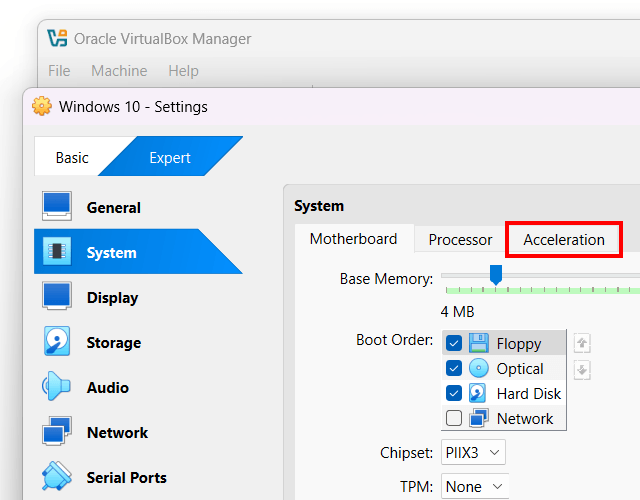
-
At Paravirtualization Interface, you select None or KVM or Hyper-V. You can try these three options to see which one works for you. For me, it was the Hyper-V option that solved the problem.
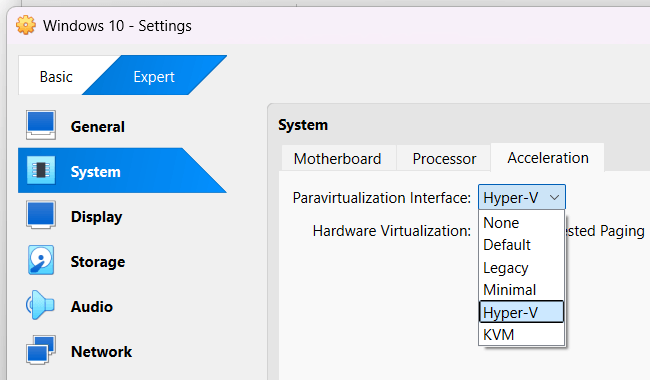
- Click on OK at the bottom of the settings window.
- Start your Windows 10 virtual machine and check if this solution solved your problem. If not, try the following solution.
Solution 2: Temporarily disable USB Controller
- Make sure the virtual machine is turned off.
- Right-click on the Windows 10 virtual machine.
-
Click on Settings.

-
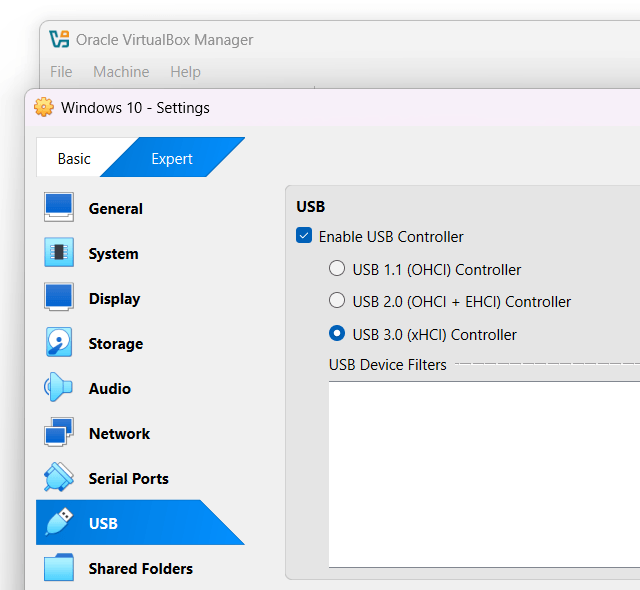
In the settings window, you click on USB located in the left menu.
-
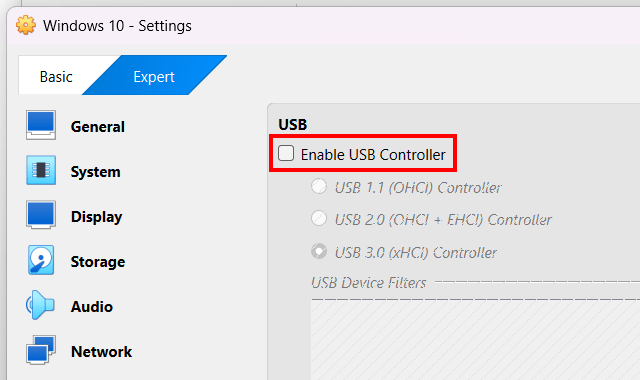
Uncheck the Enable USB Controller option.
- Click on OK at the bottom of the settings window.
- Start your Windows 10 virtual machine and check if this solution solved your problem.
You can enable this feature again after you've installed Windows 10.
Solution 3: Repair VirtualBox installation
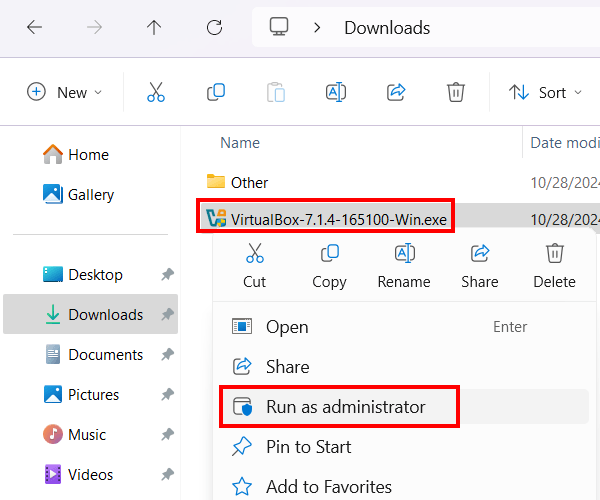
- Right-click on the VirtualBox installation file. If you don't have the file, download it from virtualbox.org. The installation file must be the same version as VirtualBox on your PC.
-
Click on Run as administrator.
- If the 'User Account Control' window appears, you click Yes. Depending on your settings, you may need to enter your administrator password first and then click Yes.
-
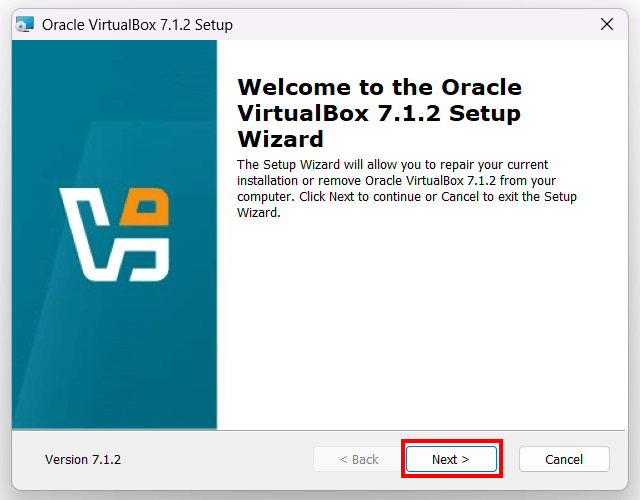
In the VirtualBox setup window, you click Next.
-
Click on the repair icon.
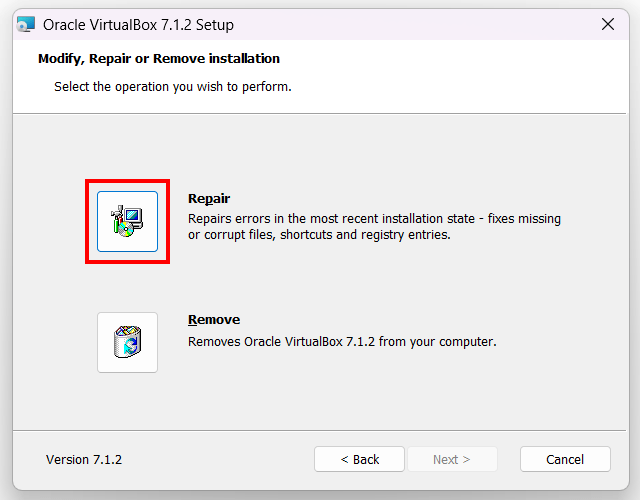
-
Click on Repair at the bottom of the setup window.
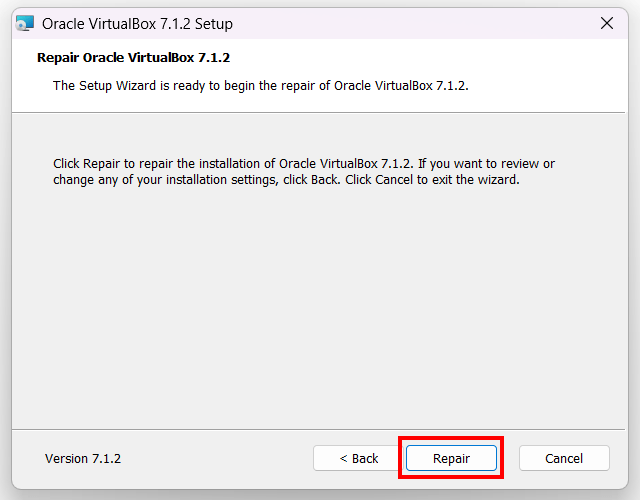
- VirtualBox will now start the repair process. This process will only take a few seconds. When the process is complete, you click on Finish.
- VirtualBox may ask you to restart your PC.
Solution 4: Uninstall, download and reinstall VirtualBox
Another thing you can try to fix the problem is to uninstall VirtualBox, download it from virtualbox.org, and then reinstall it.
Related:
VirtualBox top menu missing? Here's how to get it back!