How to fix 'VLC could not open the mpga audio encoder'
Here's a solution for when the VLC media player shows the following error: 'VLC could not open the mpga audio encoder' when converting a video.
Streaming / Transcoding failed: VLC could not open the mpga audio encoder.
Solution 1: Change 'Strict standard compliance' setting
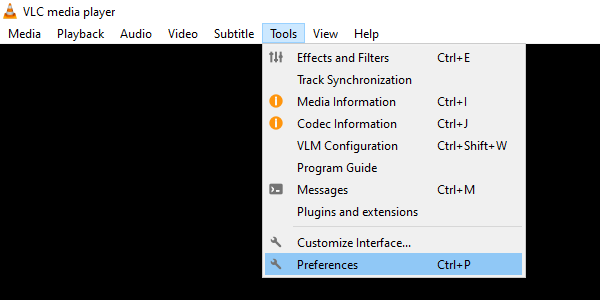
- Click on Tools in the top menu.
-
Click on Preferences.
-
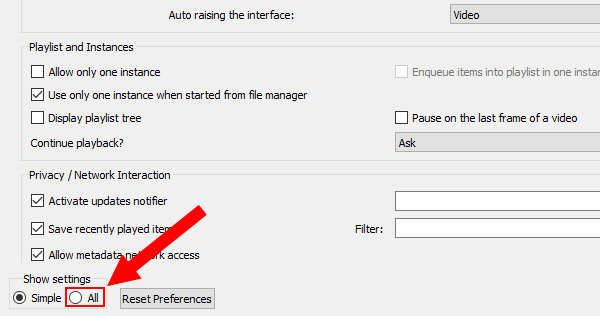
In the 'Preferences' window, you click on the All option under Show settings in the bottom left corner of the window.
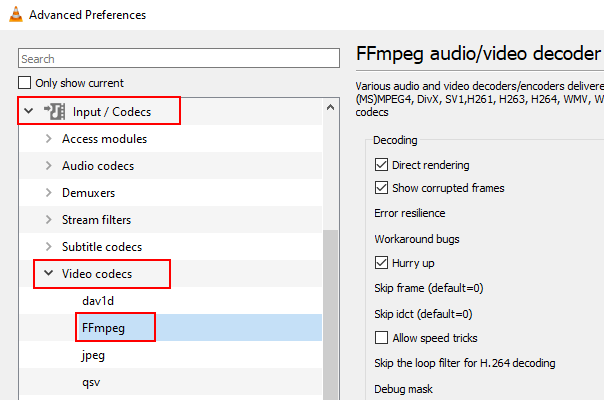
- In the 'Advanced Preferences' window, you go to Input / Codec.
- Double-click on Video codecs to expand its options.
-
Click on FFmpeg.
-
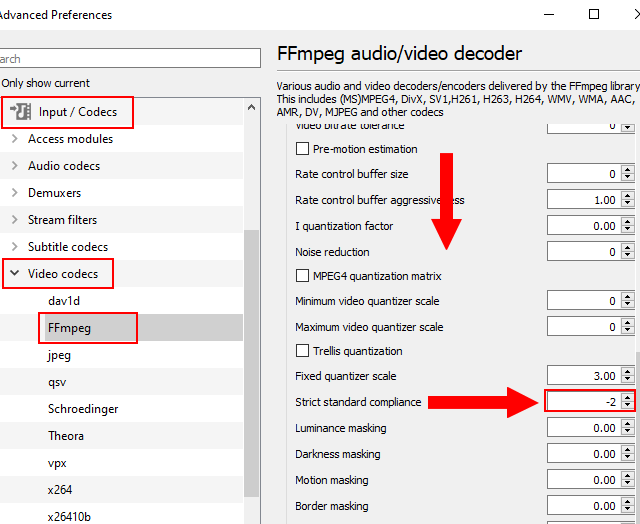
Change Strict standard compliance to -2.
- Click on Save at the bottom of the window.
- Restart the VLC media player and check if the above steps fixed your problem.
Solution 2: Change video and audio codec settings
- First, you do the steps you usually do when converting a video with the VLC media player until you reach the 'Convert' window.
-
Once you're on the 'Convert' window, you click on the wrench (tool) button next to the profile selection menu button.
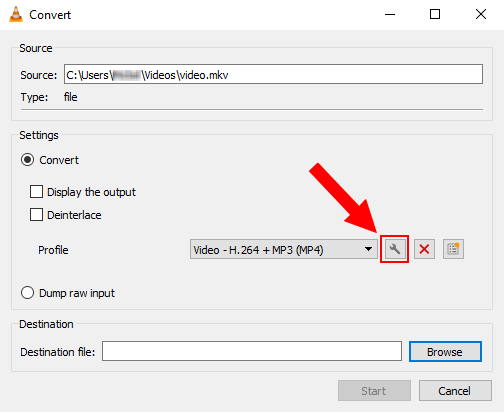
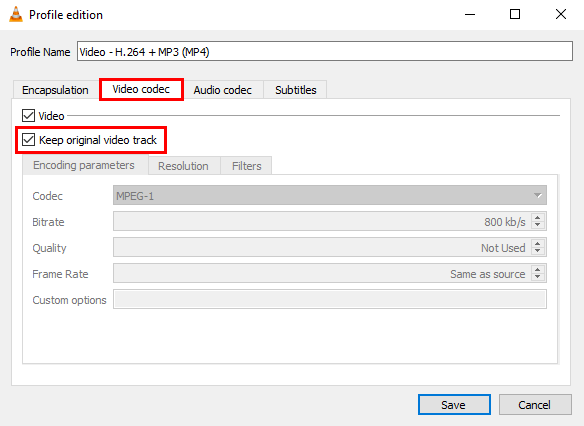
- In the 'Profile edition' window, you click on the Video codec tab.
-
Check the checkbox next to the Keep original video track option.
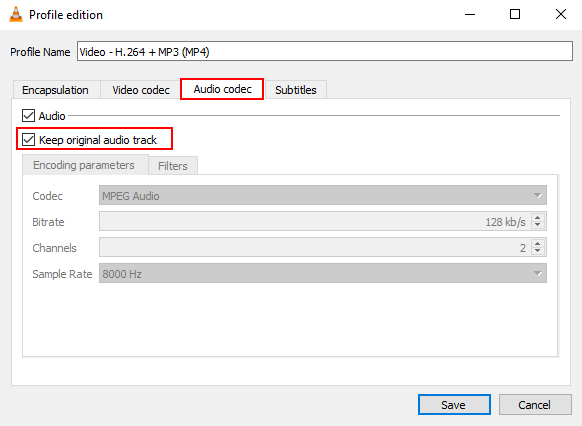
- Click on the Audio codec tab.
-
Check the checkbox next to the Keep original audio track option.
- Click on Save at the bottom of the window.
- Try to convert the video again.
Solution 3: Reset preferences
- Click on Tools in the top menu.
-
Click on Preferences.

-
In the 'Preferences' window, you click on Reset Preferences at the bottom of the window.
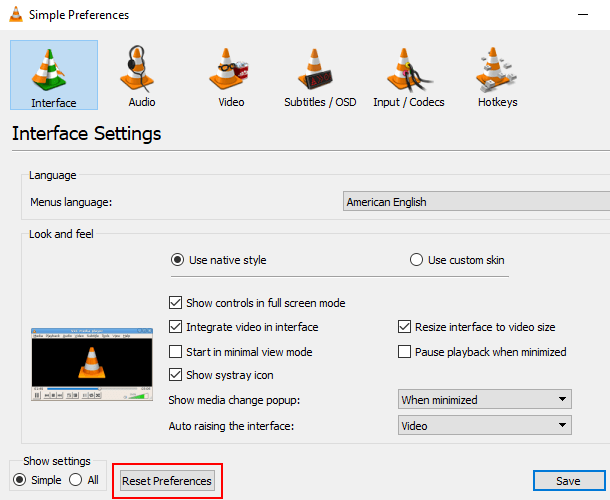
- Click on OK to confirm.
- Restart the VLC media player and check if the above steps fixed your problem.