
How to fix thumbnails not showing in Windows 10 or 11 File Explorer
When Windows File Explorer displays generic blank icons instead of picture or video thumbnails, finding the right file could take longer. This problem is usually caused by disabled folder settings, a corrupted thumbnail cache, misconfigured performance settings, or missing or corrupted system files. In this guide, you will learn how to restore thumbnails and clear the thumbnail cache in Windows 10 and 11.
Check the "View" mode in File Explorer
First, ensure the correct View mode is selected for the folder containing your photos or videos.
- Open File Explorer.
- Open the folder containing your images or videos.
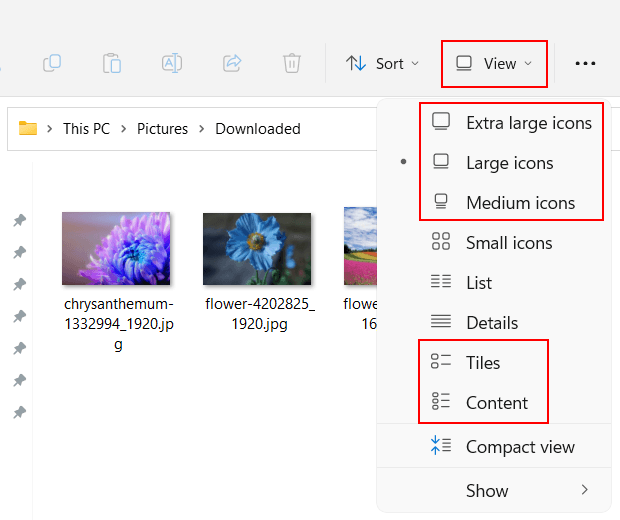
- Click on View in the top menu.
- Select Extra large icons, Large icons, Medium icons, Tiles, or Content.
Check a "Folder Options" setting
- Open File Explorer.
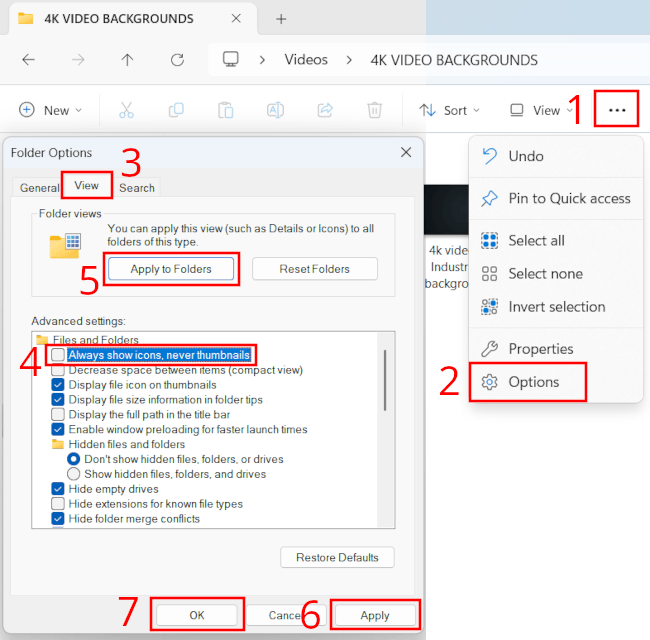
- On Windows 11, click the three-dot icon in the top menu, then select Options. On Windows 10, click File in the top-left corner and select Change folder and search options.
- In the Folder Options window, click the View tab.
- Make sure the "Always show icons, never thumbnails" option is unchecked.
- If you unchecked this option, click Apply to Folders, then click Yes to confirm, and then click Apply at the bottom of the Folder Options window.
- Click OK.
Restore File Explorer settings to default
- Open File Explorer.
- On Windows 11, click the three-dot icon in the top menu, then select Options. On Windows 10, click File in the top-left corner and select Change folder and search options.
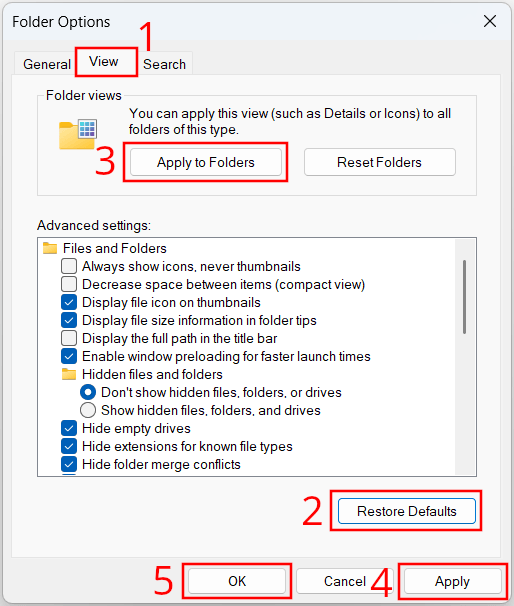
- In the Folder Options window, click the View tab.
- Click Restore Defaults.
- Click Apply to Folders.
- Click Apply.
- Click OK.
Clear thumbnail cache
- Right-click on the Windows start menu button.
- Click Settings.
- Click System.
- Click Storage.
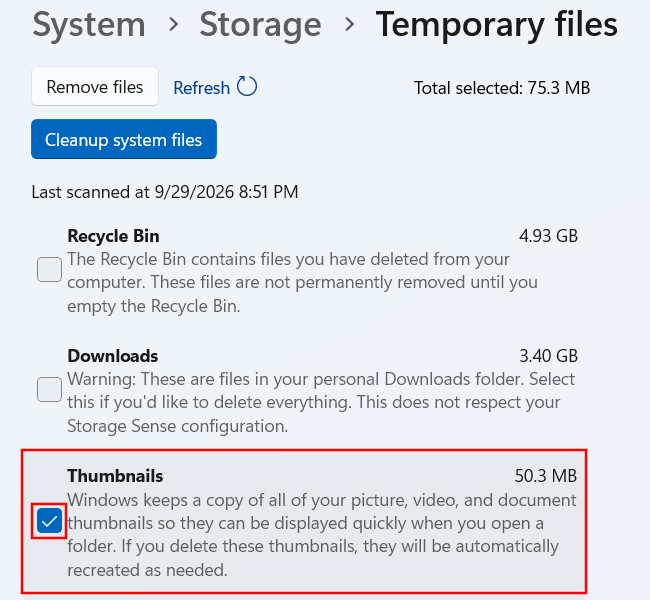
- Click Temporary files.
- Storage Sense will scan for temporary files. Once the scan is complete, make sure the box next to Thumbnails is checked.
- Optionally, select any other temporary files you want to delete.
- Click Remove files.
- In the next window, click Continue.
Windows will now delete the thumbnails and any other selected files.
This process may take a few minutes depending on your selections. Even if the progress appears stuck, allow the cleanup to finish.
Windows will automatically generate new thumbnails as needed.
Make sure your system drive has enough free space
When your system drive (the drive where Windows is installed) runs low on storage, Windows may stop generating thumbnails. Check the available space on your system drive (usually the local disk (C:)). If space is low, delete or move files to another drive, external hard drive, or cloud storage. Once your system drive has at least 1 GB of free space, thumbnails will reappear.
Restart the Windows Explorer process
- Right-click the Windows start menu button or taskbar and select Task Manager.
- Find the Windows Explorer process.
- Right-click Windows Explorer and choose Restart.
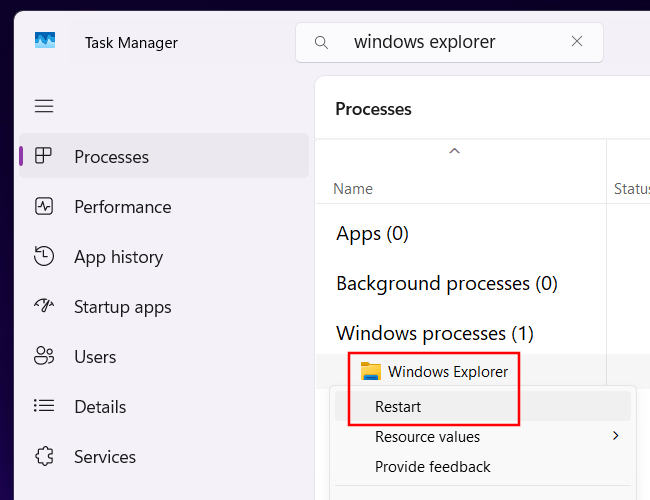
If this solution doesn't work on the first try, repeat the process up to three times.
Windows Performance Options
- Click on the Windows start menu button or search icon located in the taskbar.
- Type advanced system settings.
-
Click View advanced system settings.
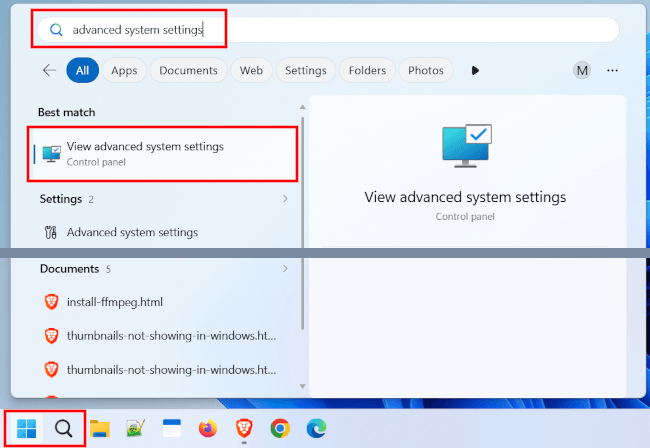
- In the Performance section of the System Properties window, click Settings.
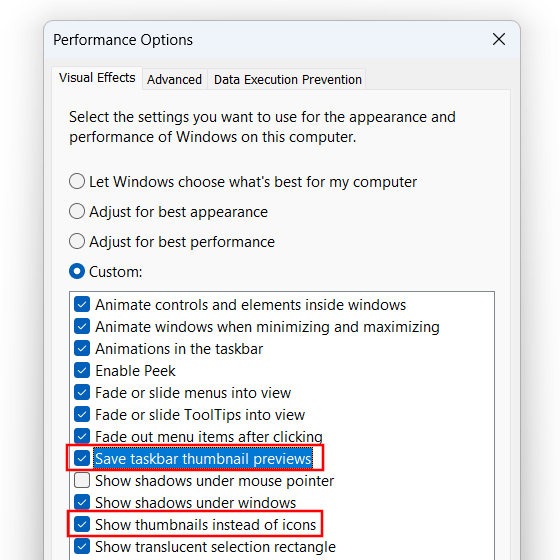
- Make sure the box next to Show thumbnails instead of icons is checked.
- Check the box next to Save taskbar thumbnail previews.
- Click Apply at the bottom of the window.
- Click OK.
Repair System Files (DISM & SFC)
System File Checker (SFC) is a built-in Windows tool that checks system files and repairs them if required.
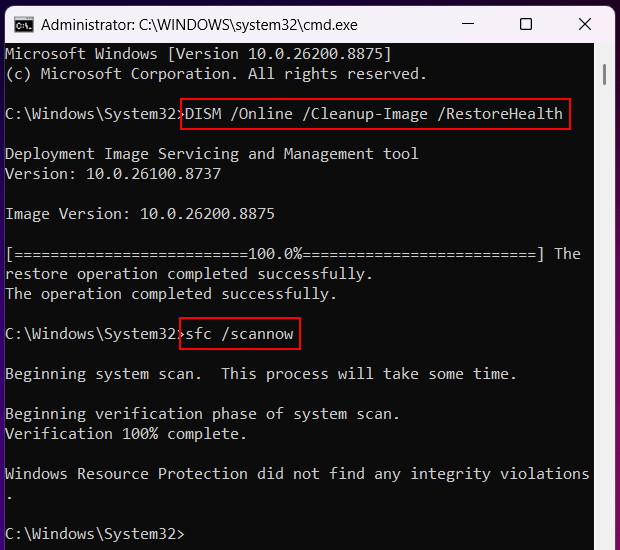
Note: DISM provides the files required to repair your corrupted system files; therefore, Microsoft recommends running DISM prior to running the System File Checker (sfc /scannow).
- Right-click the Windows Start menu button and select Terminal (Admin) (Windows 11) or Command Prompt (Admin) or Windows PowerShell (Admin) (Windows 10).
- Type (or copy and paste) the following command:
DISM /Online /Cleanup-Image /RestoreHealth - Press Enter.
- Wait for the verification to reach 100%. This process may take some time. It may appear stuck at around 60% for a few minutes. Do not close the window.
- Once DISM is finished, type:
sfc /scannow - Press Enter.
- Wait for the scan to complete. This process may take some time. SFC will show you whether it found corrupt system files and successfully repaired them.
- Restart your computer.
If the System File Checker tool is unable to fix corrupt files, visit my fix 'SFC unable to fix corrupt files' page.
Use Icaros (free tool)
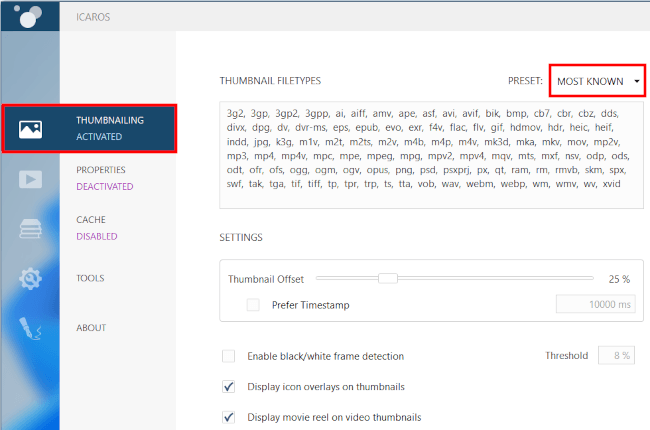
Icaros is a free program that generates thumbnails for almost all video and image file formats.
You can download Icaros from MajorGeeks.
- Open Icaros.
- Make sure THUMBNAILING is activated. If it is deactivated, click it to enable it.
- Under THUMBNAIL FILETYPES, select a preset option (e.g., MOST KNOWN).
- Close Icaros.
Related:
How to change folder picture or thumbnail in Windows 11 & 10
How to fix missing or blank taskbar icons in Windows 10 & 11
Fix desktop icons missing or disappeared in Windows 10 & 11