How to repair or reset the Settings app in Windows 11 and 10

When the Windows Settings app freezes, crashes on launch, or refuses to open entirely, resetting it restores the app to its original factory state without affecting your personal files. Whether you are running Windows 11 or Windows 10, you can quickly fix corrupt settings using built-in app controls or a simple PowerShell command. This guide shows you how to repair and reset the Settings app step by step.

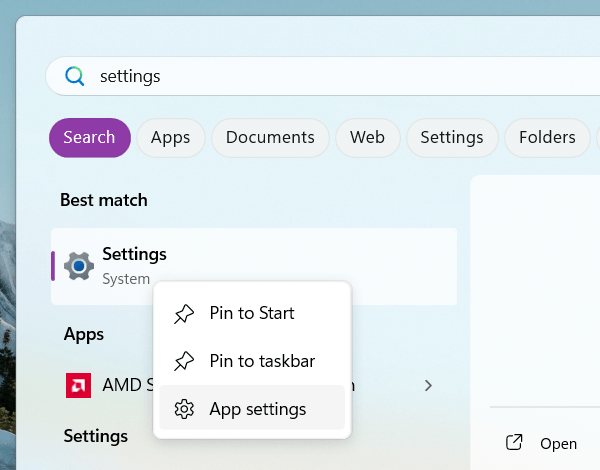
Quick tutorial: Click the Windows Start menu button or taskbar search icon, type settings, right-click Settings, and select App settings. Scroll down and click Repair. If the app still won't open, click Reset right below it.

Note: Clicking Repair fixes corrupted app files while keeping your preferences intact. Clicking Reset clears your Settings app preferences (such as custom notification toggles) back to factory defaults, but will not delete your personal files, photos, or desktop applications.

Solution 1: Repair or reset via App settings (easiest)

If the Settings app opens but runs slowly, freezes, or crashes on specific pages, you can use the built-in repair and reset tools inside Windows.

  1. Click the Windows Start menu button or taskbar search icon.
  2. Type settings into the search bar.
  3. Right-click Settings and select App settings.
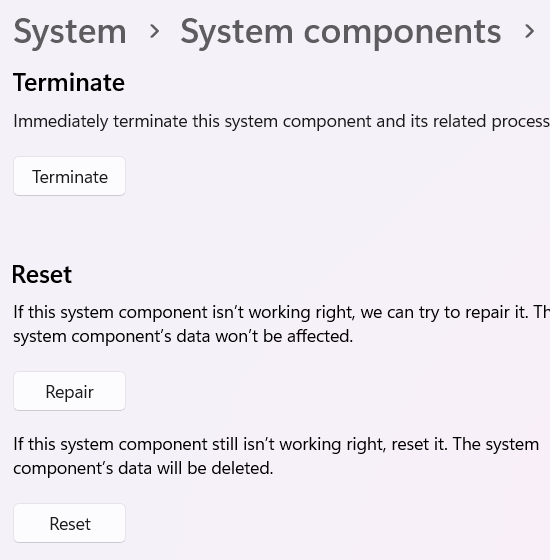
  4. Scroll down to the Reset section.
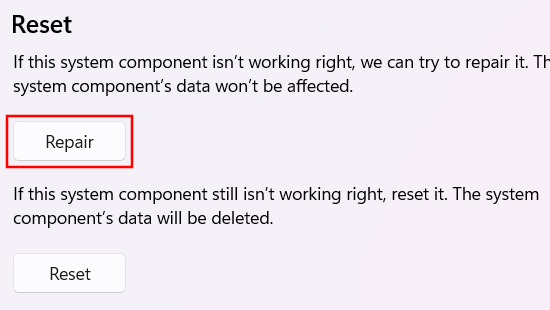
  5. Click Repair first to fix the app without losing settings.
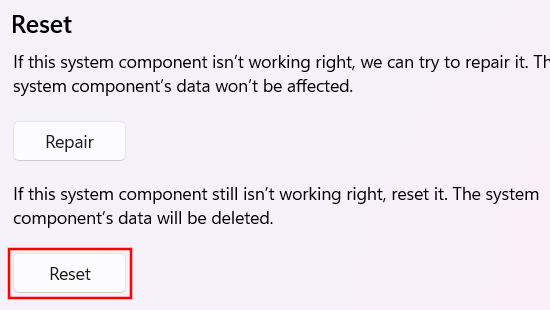
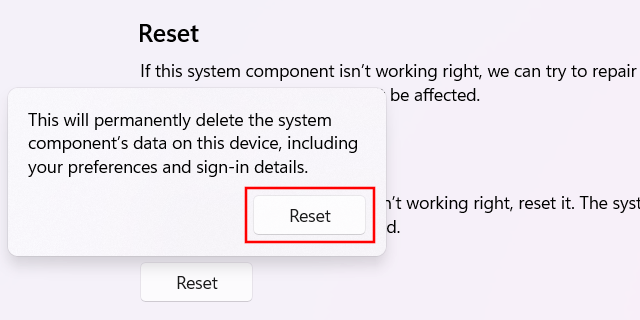
  6. If the app is still glitching, click Reset, then click Reset again to confirm.
Repair and Reset buttons in Windows App Settings

Windows will reset the Settings app and close the window automatically when finished.

Solution 2: Re-register Settings app via PowerShell (if settings won't open)

If the Settings app refuses to open at all or disappears immediately after clicking it, you cannot access the GUI Repair button. Re-registering the app package via Windows PowerShell fixes corrupted installation manifests.

  1. Right-click the Windows Start menu button and select Terminal (Admin) in Windows 11 or Windows PowerShell (Admin) in Windows 10.
  2. If prompted by User Account Control (UAC), click Yes.
  3. Copy and paste the following command into PowerShell:
    
    Get-AppxPackage *windows.immersivecontrolpanel* | Foreach {Add-AppxPackage -DisableDevelopmentMode -Register "$($_.InstallLocation)\AppXManifest.xml"}
    
    
  4. Press Enter to run the command.
  5. Restart your computer once the execution completes.
Re-register Windows Settings app via PowerShell

After restarting, click the Windows Start menu button and open Settings to confirm it opens properly.

Solution 3: Reset Settings app via PowerShell (if Settings won't open)

If the Settings app won't open at all or closes immediately after clicking it, you cannot access the GUI Repair button, you can reset the app via Windows PowerShell.

  1. Right-click the Windows Start menu button and select Terminal (Admin) in Windows 11 or Windows PowerShell (Admin) in Windows 10.
  2. If prompted by User Account Control (UAC), click Yes.
  3. Copy and paste the following command into PowerShell:
    
    Get-AppxPackage *windows.immersivecontrolpanel* | Reset-AppxPackage
    
    
  4. Press Enter to run the command.
  5. Restart your computer once the execution completes.
Reset Windows Settings app via PowerShell

After restarting, click the Windows Start menu button and open Settings to confirm it opens properly.

Solution 4: Repair corrupted system files (DISM & SFC)

If resetting and re-registering the app fail to resolve the problem, underlying Windows core system files may be damaged or missing. Running the built-in System File Checker (SFC) and DISM tools will scan and repair Windows system components.

  1. Press the Windows + R keys on your keyboard simultaneously to open the Run dialog.
  2. Type cmd.
  3. Press Ctrl + Shift + Enter to open Command Prompt as administrator.
  4. Type (or copy and paste) the following command:
    
    DISM /Online /Cleanup-Image /RestoreHealth
    
    
  5. Press Enter.
  6. Wait for the verification to reach 100%. This process may take some time. It may appear stuck at around 60% for a few minutes. Do not close the window.
  7. Once DISM is finished, type:
    
    sfc /scannow
    
    
  8. Press Enter.
  9. Wait for the scan to reach 100%. This process may take some time. If Windows detects and repairs corrupted files, restart your PC.
Use System File Checker to check system files and repair them

Note: DISM provides the files required to repair your corrupted system files; therefore, Microsoft recommends running DISM prior to running the System File Checker (sfc /scannow).

If the System File Checker tool is unable to fix corrupt files, visit my fix 'SFC unable to fix corrupt files' page.


Related:

How to reset audio settings in Windows 11 & 10 (to default)


Windows