How to remove 'Cast to Device' from the Windows context menu
This step-by-step tutorial will show you how to remove 'Cast to Device' from the context menu in Windows 10 or 11 File Explorer.
How to remove 'Cast to Device' from the context menu in Windows 10 and 11
-
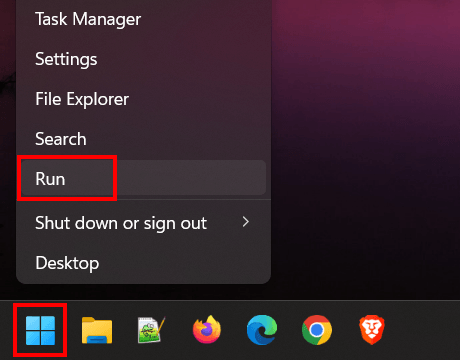
Right-click on the Windows start menu button.

-
Click on Run.
-
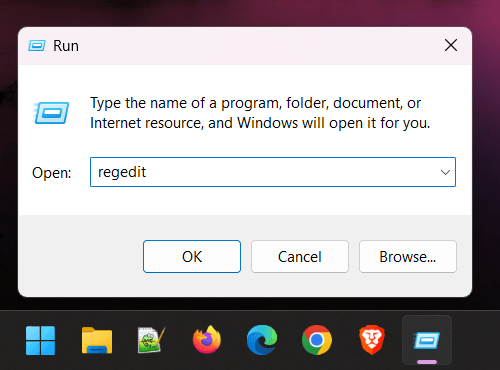
In the 'Run' window, you type
regedit. -
Click on OK or press the Enter key on your keyboard.
-
In the 'Registry Editor' window, you go to the following path:
HKEY_LOCAL_MACHINE\SOFTWARE\Microsoft\Windows\CurrentVersion\Shell Extensions\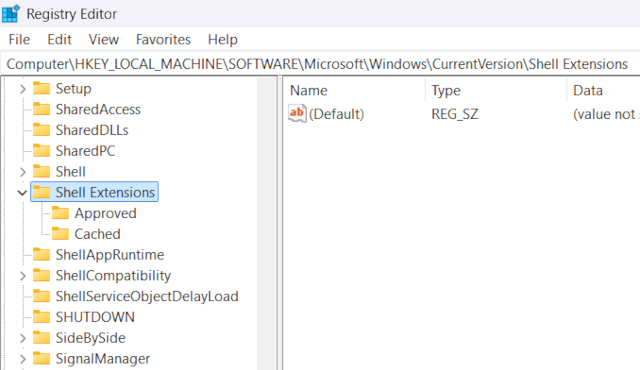
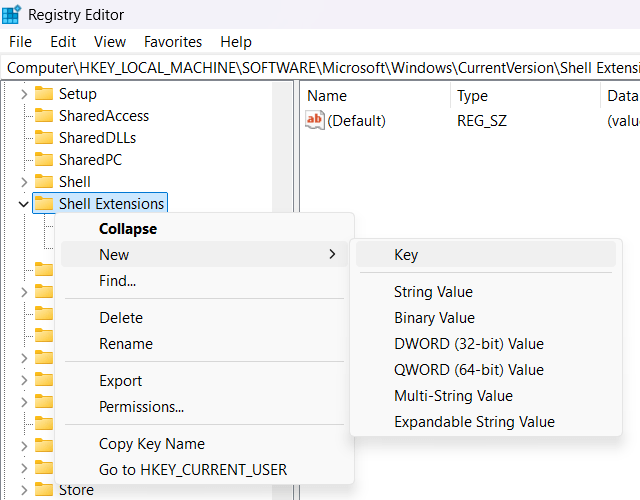
- Right-click on Shell Extensions.
- Go to New.
-
Click on Key.
-
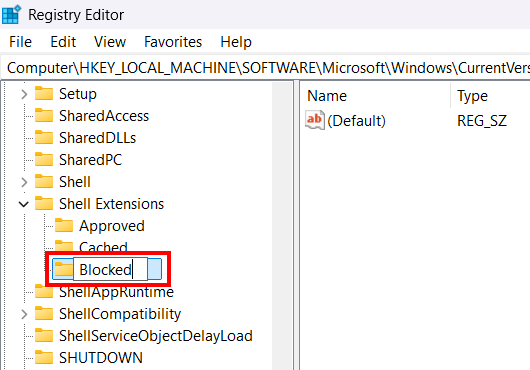
Name the new key Blocked.
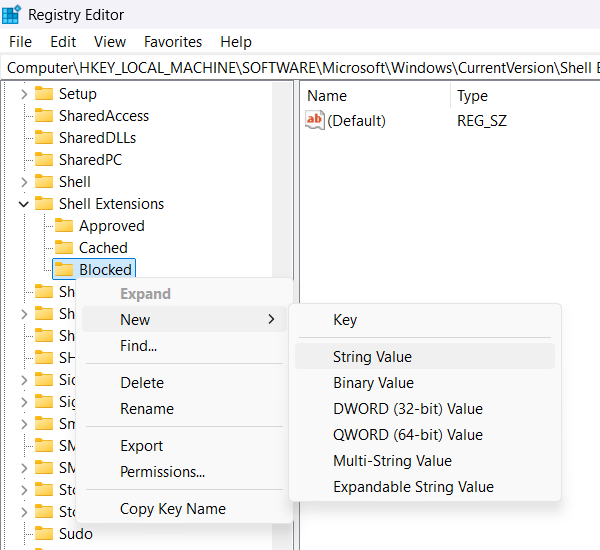
- Right-click on the newly created Blocked key.
- Go to New.
-
Click on String Value.
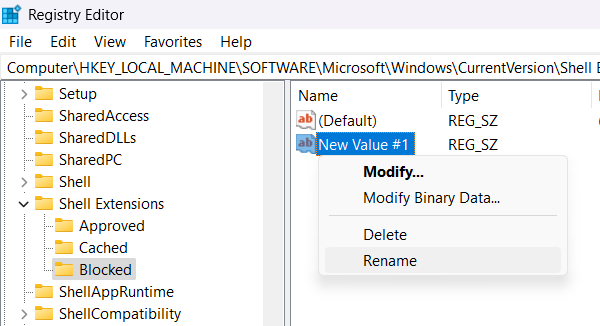
- Right-click on the newly created string value.
-
Click on Rename.
-
Type or copy and paste the following name:
{7AD84985-87B4-4a16-BE58-8B72A5B390F7}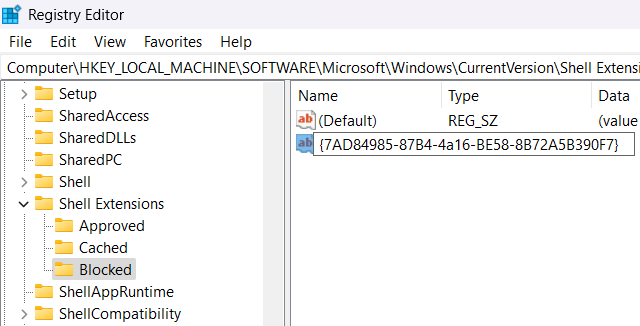
- Press the Enter key on your keyboard.
- Close the 'Registry Editor' window.
- Log out of your PC and log back in, or restart your computer to see the change.
You will now see that the 'Cast to Device' option has been removed from the context menu.
If you ever want to add the 'Cast to Device' option back to the context menu, open 'Registry Editor' and delete the new String Value you just added to the 'Blocked' key.