How to disable the touchpad when a mouse is connected
These step-by-step tutorials will show you how to disable the touchpad when a mouse is connected on a laptop with Windows 10 and 11.
How to disable the touchpad when a mouse is connected on Windows 10
ASUS
-
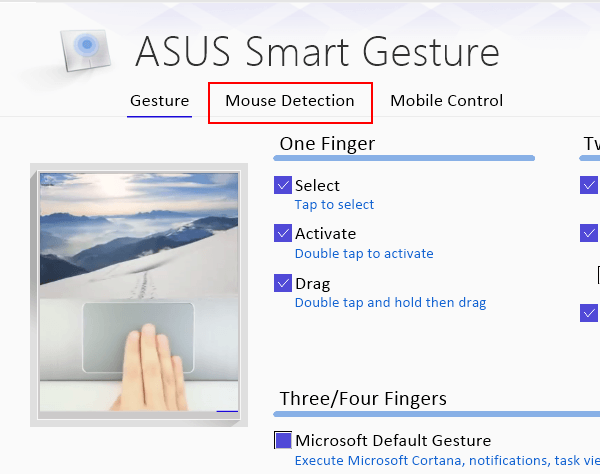
Double-click on the 'ASUS Smart Gesture' icon located in the system tray.

-
In the next window, you click on Mouse Detection.
-
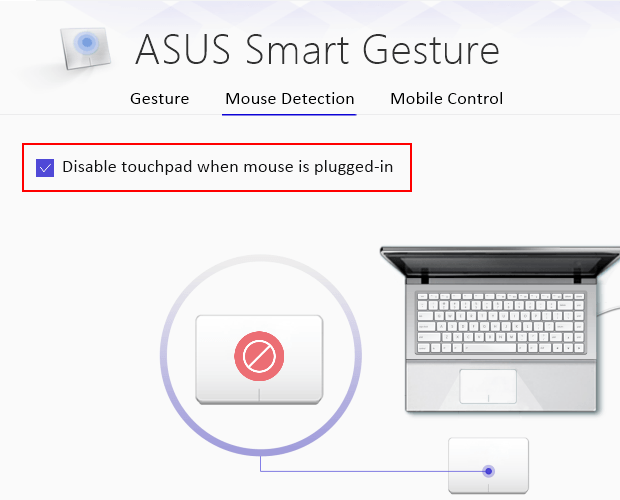
Check the checkbox next to the Disable touchpad when mouse is plugged-in option.
- Click Apply in the bottom right corner of the window.
-
Click OK.
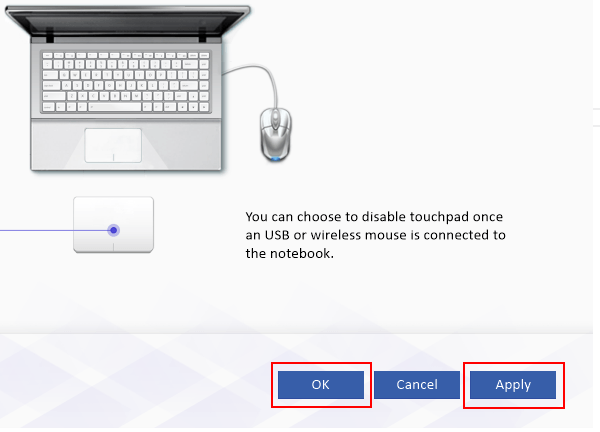
Your laptop's touchpad will automatically disable whenever an external mouse is connected.
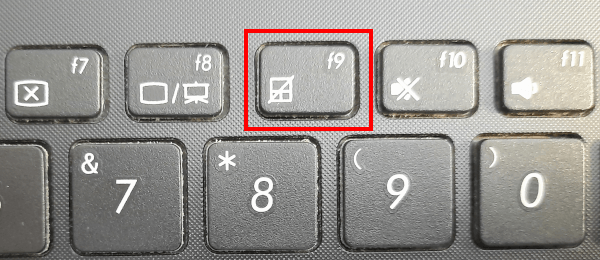
On most laptops, you can also disable the touchpad by pressing the FN (function) key and one of the F keys on the keyboard. For example, on my Asus laptop, pressing the FN + F9 keys on my keyboard disables the touchpad.
HP
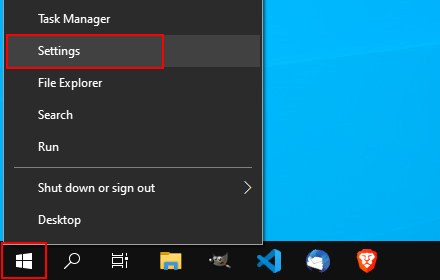
- Right-click on the Windows start menu button.
-
Click Settings.
-
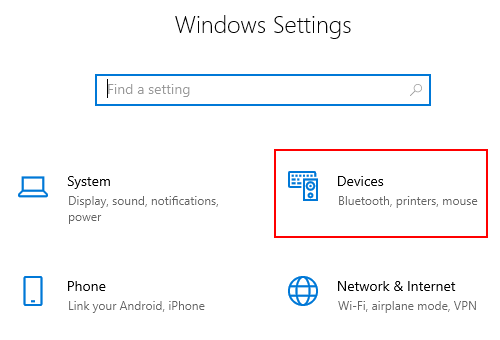
Click Devices.
-
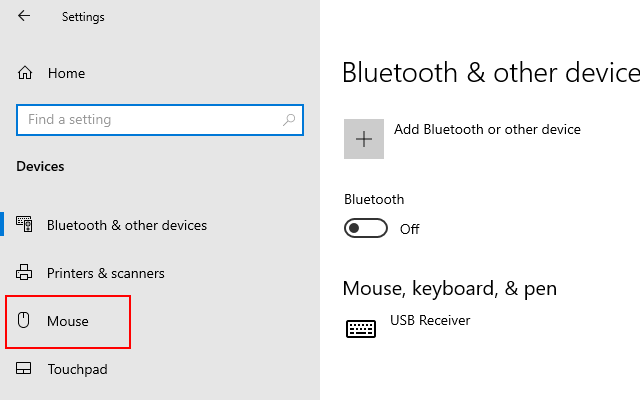
Click on Mouse in the left menu.
-
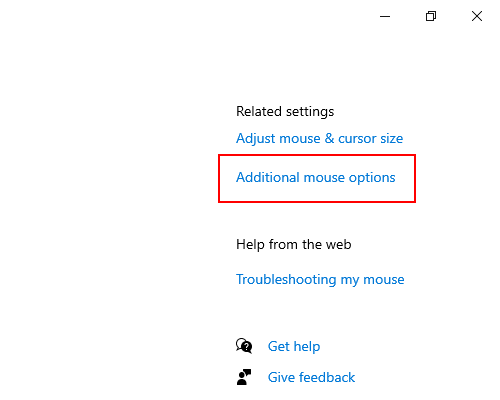
Click on Additional mouse options in the upper right corner.
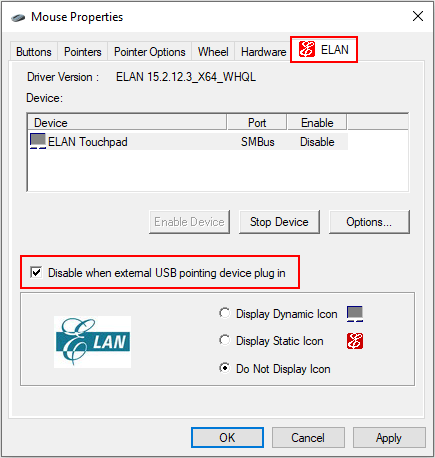
- In the next window, you click on ELAN.
-
Check the Disable when external USB pointing device plug in option.
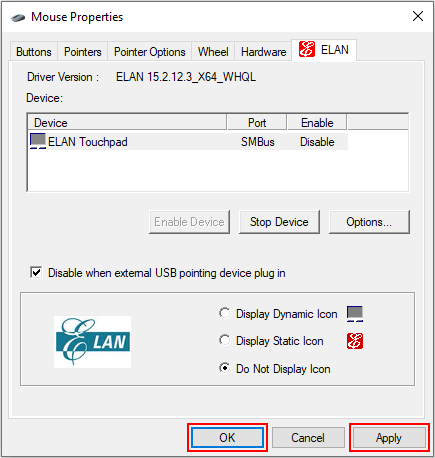
- Click Apply at the bottom of the window.
-
Click OK.
Your laptop's touchpad will automatically disable whenever an external mouse is connected.
On most laptops, you can also disable the touchpad by pressing the FN (function) key and one of the F keys on the keyboard. For example, on my Asus laptop, pressing the FN + F9 keys on my keyboard disables the touchpad.

How to disable the touchpad when a mouse is connected on Windows 11
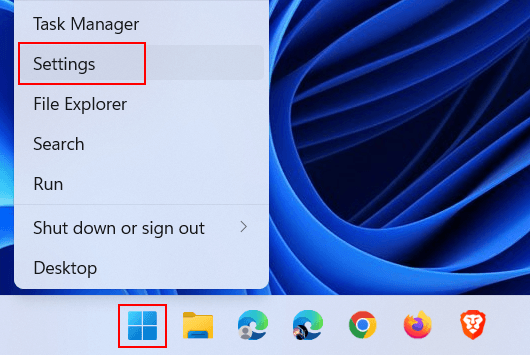
- Right-click on the Windows start menu button.
-
Click Settings.
-
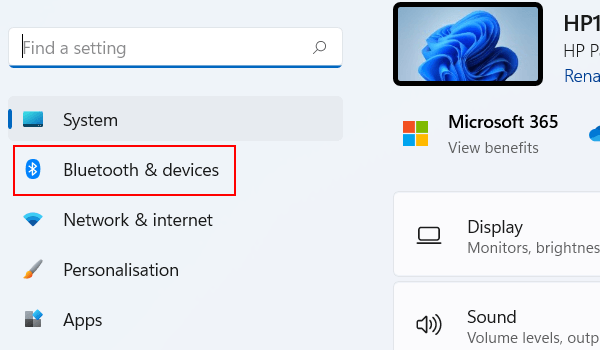
Click on Bluetooth & devices in the left menu.
-
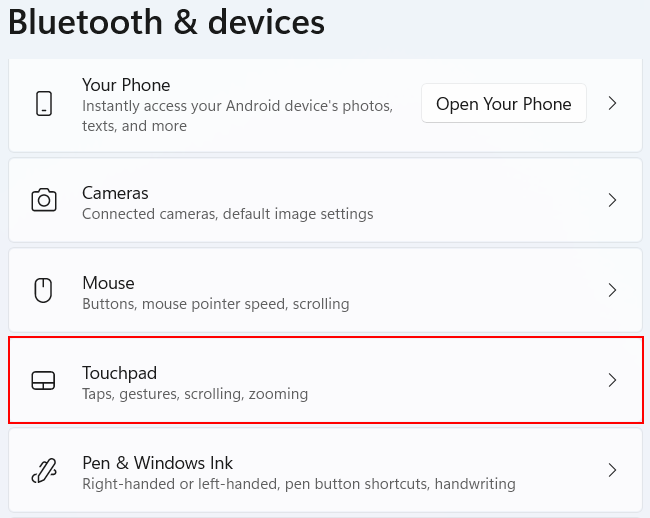
Click on Touchpad.
-
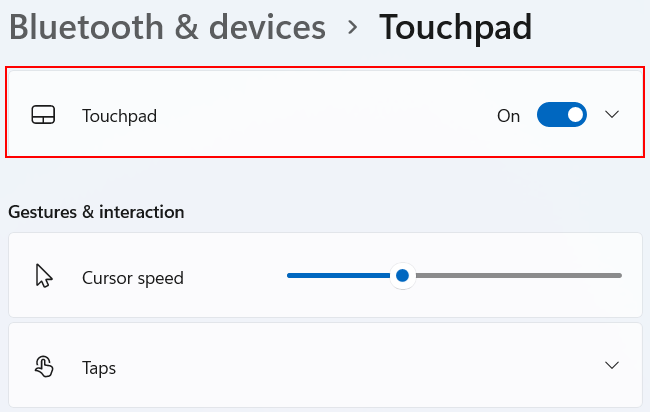
Click on Touchpad to view more options.
-
Uncheck the Leave touchpad on when a mouse is connected option.

Your laptop's touchpad will automatically disable whenever an external mouse is connected.
References: